Make your image look awesome with a few light effects


I was playng arround with Photoshop these days and discovered a great effect that I think you guys will find usefull.
Final Image Preview

Step 1
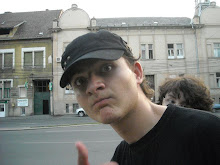
First of all you need your image. I found my image on sxc.hu. I found this image perfect for what I want to do here. ![]() .
.

Step 2
What you need to do now is to make the image black and white. For those who use Adobe Photoshop CS3 you must go to Image - Adjustments - Black & White. Also you can play a little with the settings till you get the result you want.

Step 3
Now you need to add some lights. Select the Gradient Tool and select this color: #05edfc. Also from the Gradint settings make sure you select the Radial Gradient and for the color effect to be Foreground to Transparent.
Create a new blank layer over the image. Click and drag.

Step 4
Next name the light Blue and set the blending option to Screen. You can move it wherever you want. I allready have an idea where to put my lights.

Step 5
Do this again but this time use this color: #fc05dc. Name it pink.

Step 6
And finnaly the same effect but this time use #fcf905 and set the Blending Options to Color Burn and name it yellow.

Step 7
Now I want to make something that will give this image some extra applause.
Create a new layer and fill it with Black. Make sute this layer is lower than the lights and over the actual image.

Step 8
As you can see I have applied some effects to this black layer. Use my Blenting Options.

Step 9
Now set the Fill to 0%. You should have something like this:

Step 10
Add a vector mask to this layer and mask away some parts of this patern. Here are my results:

Step 11
Now we will make the same thing but but this time make a different pattern. Make a new layer, fill it with black and use these settings. Also set the Fill to 0%.

Step 12
Now as we did with the first pattern, make add a vector mask and mask away some parts you don’t want. Here is my result:

Step 13
Ok. We have the basic of this image. Now we need to set the brush tool to match our needs because we want to make some sparcles. Go to Window - Brushes. This will bring out the brushes settings. Use my settings or experiment with your own.

Step 14
Make a new layer and make a few sparkles. Also make different layers and make sparkles with different size. Here is somethins I have done. Also there is how I organised my layers pallete.

Step 15
We will ad some more sparkles later. Now I want to make something new here. Make a new folder, name it Big Cirles and in this folder we will create a new layers. Make a selection like mine using the Eliiptical Marquee Tool.

Step 16
Now using the Gradient with a white color selected and Linear Gradient click and drag like me. After you make it you can set the Ocapity lower.

Step 17
Now we need to duplicate these circles and try to make a small mozaic with them.

Step 18
Next do the same thing but this time smaller circles. Also put them into a separate folder.

Step 19
It is time to ad more sparkles to the image. First make a new folder and name it around light. Here make a new layer and draw with the brush around the boy. After that mask away some parts and leave this light only exactly at the edges of this boy.

Step 20
Set it to Screen and also duplicate it. Make the duplicate Opacity lower.

Step 21
As I instructed you before make some sparcles in a new layer. We want to make these sparkles look like they come from that light around the boy so mask away some of them.

Conclusion
You are finished. Keep experimenting.
0 comments:
Post a Comment